Friday, September 14, 2012

Labbits Like: Carrot Ginger Soup

Orchard Hill Flax Seed bread is so good dipped in soup!
Pipkin saved the best for last in this week's final soup recipe: Carrot Ginger! This recipe is from the Kripalu Cookbook, and if you've ever had the pleasure of taking a course or staying at Kripalu in western Massachusetts, you know just how delicious their food is.

The Kripalu Cookbook describes this soup as, "a delicately flavored soup that combines the spiciness of ginger with the sweetness of carrots and onions." This soup is perfect for fall and winter, and if you're feeling under the weather, this smooth soup will soothe your sore throat and the ginger is sure to clear the sinuses. If you really like ginger, you can add more to this recipe to have a bolder flavored soup. Enjoy! Print the recipe here.

Carrot Ginger Soup

Ingredients:
1 Tbsp canola oil
1 1/2 cups sliced onions
1 1/2 Tbsp peeled, chopped fresh gingerroot
4 cups chopped carrots (5 - 6 large carrots)
4 cups vegetable stock or water
1/2 Tbsp salt
1/2 cup soymilk or light cream (optional - the labbits used heavy cream, because that's what they had)
1/2 tsp black pepper
1/4 cup chopped fresh chives

Peel the carrots.
Peel the ginger.


Preparation:
In a large pot, heat the oil and saute the onions for 3 - 5 minutes or until translucent. Add the ginger and saute for 1 minute. Stir in the carrots and stock and bring to a boil. Add the salt. Reduce heat to simmer and cook, stirring occasionally, for about 40 minutes.

Soups are so simple!

In a blender or food processor, puree the mixture until creamy, adding the soymilk, if desired. Return the mixture to the pot, reheat, and stir in the black pepper and chives. Serve immediately.

Swirl in heavy cream for a smooth, creamy soup.
Serves: 4 - 6 labbits

Recipe: Kripalu Cookbook

Thursday, September 13, 2012

Labbits Like: Potato Leek Soup

The thing about making soup that's so great is that they're really easy. Typically you start with cooking some onions in oil or butter, add in some chopped veggies with broth and seasonings and let simmer. Depending on the texture of the soup, you either blend or don't blend. Then you eat it. The second soup offering this week is Potato Leek. This is thick and creamy and hearty and perfect for chilly fall evenings. It follows the simple soup recipe: cook leeks in butter, add in potatoes and broth, and simmer. Adding heavy cream makes it fatty and delicious, but you can go without if you want a leaner soup. (Who does?)

Excuse the lack of labbit cooking photos. Pipkin hopped all over the warren with the little memory card thing, but couldn't find the camera! All he found was an iPhone. Thank goodness for instagram.

This recipe goes out to Pipkin's friend Lisa, who recently gifted him with a Cuisinart Immersion Blender and it is the best thing ever! No more scooping soup into the food processor little by little and transferring to a second pot. Labbits hate baths and having to clean extra pots. Hooray for immersion blenders! You can print out the recipe here.

Potato Leek Soup

Ingredients:
4 leeks chopped, white and light green parts only
2 Tbsp butter
4 cups of low sodium vegetable broth (or water, or half stock, half water)
2 lbs potatoes, peeled and cut into large dice
1/2 cup heavy cream
Dill (optional)
Salt and pepper to taste
Chives, chopped for garnish

Preparation:
Trim the bulb end and the tough, dark green leaves off the leeks. Using only the white and light green stalk, cut lengthwise, then rinse under water to remove any sand and soil. Chop into 1/3 inch (1 cm) slices. 

Melt butter in a pot over low heat. Add the leeks and stir to break apart. Cover with a lid and cook for 10 minutes, checking often to ensure the leeks do not brown. 

Add the broth and potatoes. Bring to a low simmer and cook for 20 minutes, until the potatoes are soft. Remove from heat and allow to cool slightly. With an immersion blender, blend the soup to your desired consistency. Some labbits like their soup with bits of potato here and there, others like their soup thick and creamy with no potato bits. If you don't have an immersion blender, transfer to a food processor to blend, then return soup to the pot. 

Stir in the heavy cream. Add in salt and pepper to taste, and dill. Serve in bowls with chives sprinkled on top and a side of crusty bread for dipping. MMmmmmm...

Serves: 4 - 6 labbits

Tuesday, September 11, 2012

Labbits Like: Cream of Broccoli Soup

Amongst the many late summer veggies the labbits received this week from their CSA (Deep Meadow Farm in Ascutney, Vermont), the labbits got a share of broccoli, carrots, onions, leeks, and potatoes, and that means soup's on! As the days get shorter and the nights get longer, the labbits love cozying up to a bowl of hot soup. This broccoli soup is simple and quick to make. Serve it with crackers, or hearty bread and butter, and even some shaved Vermont cheddar cheese. Yum!

The labbits declare this week Soup Week! Keep checking back this week to see two more soup recipes. For a printable version of this recipe, click here.

All you need is some broccoli and some onion. The rest of the ingredients should be in the pantry!


Creamy Broccoli Soup

Ingredients:
1/2 cup onion, chopped
1 Tbsp butter
3 cups of broccoli, chopped, plus small florets for garnish
4 cups vegetable broth
1/2 cup heavy cream
3 Tbsp all purpose flour
Salt and pepper to taste
Shredded cheddar cheese (optional, for garnish)

Preparation:
In a large pot over medium heat, saute the onions in butter until they turn translucent and are tender. Add in the chopped broccoli and saute for a minute. Add in the broth and bring to a boil. Reduce heat and allow the soup to simmer for about 10 minutes, or until the broccoli is tender. Remove from heat and allow to cool slightly.

Using an immersion blender, puree the soup in the pot, or puree in a food processor in small batches, then transfer the soup back to the pot.

In a small saucepan over low heat, warm the heavy cream, but do not bring to a boil. Whisk in the flour a little a Tbsp at a time. Stir cream into the pot of soup, and add salt and pepper to taste. 

Serve immediately with a garnish of small broccoli florets and shredded cheddar cheese. Add some bread and butter or crackers to the side. Enjoy!

Serves: 4 - 6 labbits.

Monday, September 10, 2012

Where'd You Get That Black and White Labbit?

I get quite a few queries about my black and white Dutch labbit, Ted DeCoste. "Where can I get that black and white labbit?", "What kind of labbit is that black and white one?", "Did you make that one yourself?"

Ted is a 5" Happy Labbit, specifically a limited edition Christmas Happy Labbit, and he comes from Sputnik Ranch, a shop in New Orleans, LA. In the next picture you'll see the box he came in, the four accessories (elf legs, Christmas tree light, present and candy cane) and what he used to look like - all white (that's Pipkin helping to model).

Ted, being a Christmas labbit, made a special Christmas wish, and his wish was that he could be a black and white Dutch labbit. "They look so dapper," he said. "And all southern labbits need to look dapper." And so, he got his wish.

First, we started with an image search of Dutch labbits. They're easily distinguished ("oh yes, I would like to look distinguished," Ted said) by their markings.

According to the American Rabbit Breeders Association, the Dutch rabbit is described thusly:

The blaze is an even wedge of white running up the rabbit's face. It is shaped by the cheeks which are the rounded circles of color on either side of the face. The neck marking is a white wedge on the back of the head. The saddle is to be a straight line running behind the shoulders and continuing underneath the rabbit to the undercut across the belly. The stops are located on the rear feet, which should be white from the toes to a point one third the length of the foot.

Ted really wanted to have one black foot and three white ones, he didn't care about being a "perfect" Dutch rabbit. He's a labbit after all. So we did a sketch, which you see above. He approved, and the makeover began!


All makeovers start with a clean canvas. That means,

"NO! Don't say it!!" 

Ahem. That means, bathtime for labbit. (Labbits are not fond of baths. Here's how you keep your vinyl labbits clean.)

Into the sink with Ted, with some warm water and some suds. There. Squeaky clean.

Ted was told his makeover would be a lot like spray tanning. "What's spray tanning?" he asked. Right.

We put him inside a box where the spray would be contained. On went a white primer, which would give the black paint something to stick to. To be safe, we plugged his mouth with a cotton bud. As we soon discovered, we should have covered his eyes as well. 


After a couple coats of primer and a full night of drying time, Ted emerged from the box and shook himself off. He was no longer bright white, but a softer, more sophisticated eggshell (so he says). 

His eyes were still visible, which was helpful in the next step.


Ted posed for this picture with Pipkin. See the color difference?


We traced over the eyes and stayed as close to the original as possible, but this turned out to be really difficult. 

(If you've never painted anything before, even with one color, as I've done here with black, may I suggest you practice first and don't start with a 3-dimensional object? This was stressful!)


Phew! He can see now!

Knowing a mask was going to go around his eyes, we decided a white ring around the eyes would look very handsome.


When we got to this part of the makeover, the other labbits seriously considered a Rorschach look for Ted. I agreed that would have been really cool, but it was all up to Ted, and he said he was more of a classic labbit than an artsy labbit. Dutch labbit was the final word. 


With the face and ears done, Ted is pretty freakin' happy. 


Now for the rear end! Ted got his one black paw, and a black tail, too. He's quite pleased.

A night of drying time, one nice coat of Krylon's matte sealant, and another bit of drying time and...


...another bath! Argh!


"Sigh."


 The finished makeover!
After a nice rubdown in the towel, Ted was very happy with his makeover. He looks quite dapper, and hopes he never has to take another bath again. (We'll see.)

Sunday, September 9, 2012

Labbits Like: Fluffy Buttermilk Mini Donuts

It's a gorgeous, late summer Sunday in Vermont, and Masher McBuns is off for a 6 mile run, followed by a 25 mile bike ride later today. He likes to treat himself to something hot and fresh from the oven, so it's a good thing he lives with labbits who like to bake.

Ted DeCoste took over in the kitchen today and baked up some delicious, fluffy-as-a-bunny mini donuts (well, mini to humans, but perfectly labbit sized). These are super simple and super quick to bake, and if you've got friends over, you may want to set out a few different glazes, sprinkles and cinnamon and brown sugar so they can make their own toppings.

Ted made three kinds today: chocolate glazed, (Dutch labbits have a thing for things two-toned), chocolate glazed with chocolate sprinkles, and good old fashioned cinnamon sugar. These are also tasty plain, if you're into plain donuts. Since they're mini sized, you could float one in your coffee mug! Print the recipe here.

Here's how to make them:


Fluffy Buttermilk Mini Donuts

Ingredients
For the donuts:
2 cups all purpose flour
3/4 cup granulated white sugar
2 tsp baking powder
1 tsp salt
1/4 tsp ground nutmeg (optional)
2 eggs
3/4 cup buttermilk
1 tsp vanilla extract
2 Tbsp melted butter


For the glaze:
1/2 cup your favorite chocolate chips (Ted used semi-sweet)
1 cup confectioner's sugar
2 Tbsp hot water
1/2 tsp almond extract (optional)
This is enough glaze for all three dozen mini donuts.

For cinnamon sugar topping:
1 Tbsp or so of melted butter
1 Tbsp brown sugar
1 Tbsp granulated white sugar
1/4 tsp cinnamon (or more...Ted likes MORE!)
This is enough cinnamon sugar for at least a dozen mini donuts. Depending on how crazy you get with coating the donuts, this can coat more mini donuts. 

Other fun things: 
Sprinkles!
Mini Chocolate chips!
Shaved almonds!
Chopped peanuts!
Shaved coconut!
Exclamation points!

Preparation:
Preheat your oven to 400ºF. Lightly grease a mini donut baking pan.


In a large bowl, whisk together the flour, sugar, baking soda, salt, and nutmeg. 


In a medium bowl, lightly beat the eggs, then add the buttermilk, vanilla, and melted butter. Add the egg mixture to the flour mixture and mix until the ingredients are well blended. The batter will seem sticky!


If you have a pastry piping bag thing, pour the batter in - it makes it easier to pipe the batter into the mini donut pan. Ted doesn't have a fancy pastry piping bag thing (probably because he doesn't know what they're called) but a quart sized ziploc bag works in a pinch. Pour the batter in (it'll fit!), zip closed, then snip a small corner off the bottom of the bag. Voila! DIY pastry piping bag thing.


Squeeze the batter into the prepared mini donut baking pan so each recess is about 1/2 to 2/3 full. 


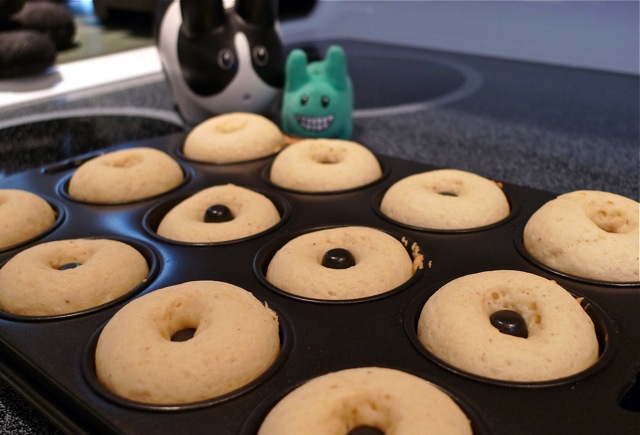
Pop in the oven for 7ish minutes (oven temps vary, so yours may take more or less time), or until the donuts spring back when pressed gently with a paw.

Mmmm, springy and fluffy!
Allow to cool in the donut pan for a few minutes before popping them out onto a wire rack to cool. Ted's only got one mini donut pan, so he repeated this two more times. This recipe yields about 3 dozen mini donuts. YUM.

For the glaze:
For a plain glaze, slowly add the confectioner's sugar into a small bowl with the hot water and almond extract. Mix until smooth, then dip one side of the mini donuts in, and set aside to cool. How does Snoop Dogg glaze his mini donuts? He drizzles, fo' shizzle.


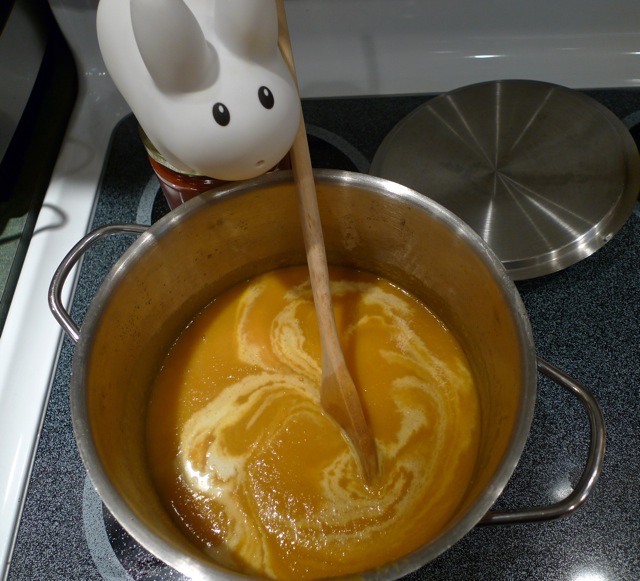
For chocolate glaze, set a bowl inside a pot with an inch of water and turn the heat to low. Add the chocolate chips, and stir continuously as the chips melt.


Once they've melted, stir in the confectioner's sugar, hot water and almond extract. Dip in the mini donuts to coat (watch your paws, the glaze will be hot!) and set aside to cool. You may also drizzle the glaze, and make fun patterns and the like.


For glaze and sprinkles, dip the donut (or drizzle) in the glaze, and immediately dip them again into a plate with sprinkles, then set them aside to cool. Easy! Fun!

Other fun stuff - you could dip them into chopped nuts or coconut shavings, use all sorts of sprinkles or do a half plain/half chocolate glaze or half glaze/half sprinkles! They will be oh so pretty, and oh so tasty!

For cinnamon sugar donuts:
For the timid and restrained, brush a little melted butter onto the top of a mini donut, then dip into a small bowl with the cinnamon and sugars combined. Done!

For the bold and brazen and super fit triathletes who dare to eat what they want, toss the donuts in the melted butter. Then, in a separate container, toss the donuts in with the cinnamon sugar and shake, shake, shake!

Cinnamon sugar donuts are best consumed fresh. The glazed donuts will keep for a couple days in an airtight container. They might last longer, but who doesn't finish them the first day?

Yields: Three dozen mini donuts.

Crazy for donuts!

Wednesday, September 5, 2012

Together, At Last.

Nearly a year ago, Moby and Kelty (the pink whale and the white whale, respectively) swam out of the Atlantic Ocean at Wallis Sands State Park in order to make the pilgrimage to see their land swimming whale cousins in Burlington, Vermont.

Little did they know, they would be sidetracked by visiting Vermont vistas such as Hogback Mountain, or that Kelty would be whisked away with Clover to Punta Cana in the Dominican Republic. They never dreamed that they would be joined by another Munko whale from the warm, west coast waters of the Pacific Ocean.

But during the height of summer, they finally found themselves in the northwestern corner of Vermont, and Reverence, the name of these whales, was upon them.

There was a moment of silence as they reflected on their travels thus far.

 
Then, they made their way up the path.

And they went for a lovely swim together, at last.